
Disponible en:
 Español
Science Department

Sandra Doria
Director of Mathematics and Science
[email protected]

Dana Baker
Program Director of Elementary Science
281.985.6414

Willette Trotty-Aubrey
Program Director of Middle School Science
281.985.7962

Xandra Williams-Earlie
Program Director of Secondary Science
281.985.6420
Science Fair
Aldine ISD District Virtual Science Fair
Dates
High School
Phase 1 Online Judging, January 10-12, 2022 *
Phase 2 Face to Face Judging, January 15, 2022 * 8:30-1:00
Child Nutrition Center
Awards Ceremony, January 15, 2022 * 3:00-3:30
Child Nutrition Center
Middle School
Phase 1 Online Judging, January 5-7, 2022
Phase 2 Face to Face Judging, January 14 or 15, 2022
Awards: TBD
District / Regional / State / International Science Fair Categories
Life Science
- Animal Sciences
- Behavioral and Social Sciences
- Biochemistry and Microbiology
- Medicine and Health
- Plant Sciences
Physical Science
- Chemistry
- Earth and Environmental Sciences (new)
- Energy and Transportation
- Mathematics
- Physics and Astronomy
- Systems Software (new)
Engineering
- Aerospace Engineering
- Biomedical Engineering (new)
- Chemical Engineering and Material Science (new)
- Embedded Systems (Electrical Systems/communications)(new)
- Engineering Mechanics (new)
- Environmental Engineering (new)
- Robotics and Intelligence
Format
Asynchronous and Synchronous
A Science Project is a way for a student to carry out an investigation in much the same way a real researcher might in a real laboratory. It is an investigation, initiated by a student and carried through all the proper steps to answer an original question.
A Science Project is NOT…
A RESEARCH PAPER: A research paper is an important part of a Science Project. The research paper will explain what is currently known on the topic of your investigation. It might be called “Background Information”. The research paper, though, is not enough. Sometimes a student will present a project that is nothing more than a display of research. The title might be, “What makes Volcanoes Form?” All the information they found in their research will be presented along with wonderful illustrations and/or a model. This is NOT a good example of a Science Project.
A MODEL: A model may or may not be part of your Science Project, but like the research paper, it is not enough. There are many wonderful models that are available in stores. You could even make your own model of something natural (the solar system) or man-made (a nuclear power plant) but neither of these would make a good Science Project.
A TECHNOLOGY DISPLAY: Quite a bit might be learned by building a laser or a working computer but again, simply building a piece of technology and writing about what you did is not a good Science Project.
A SCIENTIFIC DEMONSTRATION: Most books of science experiments are very poor resources for Science Projects. These books are full of experiments that can be performed easily in the home with common objects. The experiments are meant to illustrate certain scientific principles and you might learn something by performing these experiments but they are not true scientific investigations and so do not make good Science Projects.
CONSUMER TESTING: While consumer research and scientific research share many of the same process skills it is a good idea to avoid a Science Project with a topic such as “Which Brand of Paper Towel is the Best?”(And, no, it is not any better if you replace the words “Paper Towel” with “Laundry Detergent”, “Dishwashing Soap” or any other product!)
Science Project Checklist
Below is a list of the steps you should follow to complete your science project. Use the link at the bottom of this page to print up the checklist. You can use it to keep track of your progress.
- Begin your Project Log.
- Come up with your Question.
- Complete your Research.
- Generate your Hypothesis.
- Design your experiment.
- Fill out and sign your Protocol Paper.
- Perform your Experiment. Login/Register for Scienteer.
- Prepare your Oral Presentation.
- Complete your Report.
- Prepare your Display Board. Prepare your Powerpoint/Google Slide Presentation.
- Record your Oral Presentation over your Powerpoint/Google Presentation (additional bullet)
Information for Parents
The purpose of a Science Project
A Science Project is a way for a student to carry out an investigation in much the same way a real researcher might in a real laboratory. Each step in the scientific method has the potential of teaching a valuable lesson to a student. Below is a list of the steps in the scientific method and what are the potential benefits for students at each step.
QUESTION: Children have a natural ability to ask probing questions. Unfortunately we don’t put enough emphasis on student questions. The school curriculum has its own set of questions we must concern ourselves with and little time is left for children’s questions. A Science Project is an opportunity to give voice to children’s questions and give kids a sense of power when they are able to answer their own questions.
HYPOTHESIS: We often ask students to predict the outcome of some situation in a classroom laboratory. It is not often, however, that we ask them to form a hypothesis about anything very complex. The situation is different, though, when it comes to a Science Project. Here the complexity of their hypothesis is limited only by how imaginative they were when they asked the question.
PROCEDURE: Experimental design is probably one of the most important skills for a scientist to have and one of the most difficult skills for a scientist to learn. In our classrooms students often perform experiments that were designed for them. In a Science Project, however, they get the opportunity to develop, with guidance, this important science process skill.
DATA: Data collection is probably the skill we practice most in our classrooms. A Science Project is still another matter, though, when it comes to data collection. A good Science Project will have students taking a great quantity of data measurements over a substantial period of time. This kind of data collection more closely resembles the way actual research is carried out.
CONCLUSION: In most experiments you find in books, and in many experiments carried out in the classroom, the results are known ahead of time. The book or the teacher will tell the student what the expected result is. These experiments are used to demonstrate and/or confirm a scientific principle that is already established. In a good Science Project, however, the students will have to draw their own conclusions. Here again is an opportunity for the student to gain experience with higher level thinking skills.
PRESENTATION: Of all the skills gained in doing a Science Project, the skills involved in the presentation are probably the most important to the greatest number of children. Even students who have no interest in science will need presentation skills no matter what their chosen career path. In so many situations it is not so much what we say as how we say it. The ability to speak to another person or a group of people, the ability to explain something you understand clearly enough so that another person can understand it. The ability to demonstrate your knowledge and skills in a way that impresses others, these are all-important skills.
* * *
A Science Project has the potential to be a wonderful learning experience for students. It also has the potential to be an annoying waste of time. We can make it more the former if we keep some things in mind.
STUDENT INPUT: From topic choice to experimental design, from the collection of data to constructing a display board. Whenever the student is deciding what happens he or she is learning important decision-making and problem-solving skills.
TIME: One of the elements that make a Science Project so dreaded is also what makes it so powerful a learning experience. A good Science Project takes a lot of time, but this can be what makes the experience have a greater impact. Little will be gained from a Science Project done over a single weekend.
PROBLEMS: Unlike an experiment taken from a book or designed by a teacher, a student-generated investigation is likely to run into problems along the way. Procedures that you think will work often don’t and have to be redesigned. This process, of seeing problems and fixing them, is another element of a Science Project that can make it a useful learning tool.
A Student Science Project can be a unique opportunity for some in-depth learning of real-life skills. Students, parents and teachers all can make sure that the experience is a good one if we focus, not so much on competition, but rather on what can be gained by the student throughout the entire experience. Working together we can make our Science Projects one of the richest and most memorable experiences of the entire school year.
How much help is helpful?
Parent involvement is a key factor in student success for any science project.
One thing you can do at home is help the child to find an appropriate question for his or her investigation. We have distributed information on the kinds of questions that make better Science Fair questions and you may use this to help you in your search for a question, The main thing is to help the student choose a topic that will keep his or her interest over the lengthy time period that it will take to complete the project.
In the search for a question for investigation research will be necessary. Something else that can be done away from school is a visit to your local library. If your child has an interest in, for example, cars then he or she should find out all they can about cars from books, encyclopedias, periodicals and the internet. This research will probably help to generate or to narrow the scope of their question.
While some students will be able to perform their investigations in school, much may have to be done in the home. Parents and other responsible people in the home can help out by making sure that the children are performing the their experiments in a safe manner, following all safety guidelines.
When all data has been gathered and your young scientist has reached a conclusion, one final step is the preparation of an oral presentation. Students will be asked to explain all phases of their investigation to their teacher, their classmates and eventually to judges. You can help your child to prepare for this part of the Science Fair Project by allowing him or her to make a presentation to you. It is important that the student be able to answer questions about their project so you will want to generate questions for your child also. Make sure that your child is ready for anything a judge might ask about the project.
While parents and other adults in the home can be of the greatest help to a student who is doing a Science Fair Project, they must be very careful not to offer so much assistance that the student begins to lose the learning value of the project. As adults who care about kids we feel uncomfortable seeing them struggle with something, especially when we can easily offer help. Still, struggling with a problem and reaching a solution on their own is one of the very best learning experiences that can result from any school assignment.
First of all, while we want to help a child choose an investigation that is safe, and that they can be successful with, we must try to be sure that we do not guide them overly in their choice of topic. It is the child who will have to do all the work and they will be much more motivated to put forth an effort if the investigation is one of their own choosing.
During the investigation you will want to monitor how the child performs to make sure he or she operates in a safe manner and that the data they collect is accurate. If you find yourself wanting to take over, don’t. If the work is beyond the student’s ability, then they will need to modify their experiment. The child’s investigation should be something they can do with a minimum of supervision and concern about safety.
One way to help a child is through guiding questions. For example, suppose a child is making a measurement with a ruler but is using the ruler incorrectly. They might be starting, instead of at zero, at the one-centimeter mark (a common mistake). Rather than take the ruler from the child to demonstrate the correct method for measuring you might want to simply ask the child, “At what number are you supposed to begin on the ruler when you measure?”
In the end, a project which is the result of the efforts of the child alone, while it may not look as neat as we would like, will be a much greater learning experience for the student than if we, the adults, have too much of a hand in the work.
Step 1: Begin Your Log Book
A project log is an important resource. It is a permanent written record of all that you do during your investigation. Not only will it allow you later to write a thorough and accurate Report but also, just by writing it, you will have to think about what you are doing. This thinking will improve the quality of your Science Project.
The Guidelines:
- The notebook must be bound. Loose paper is unacceptable.
- The front cover must have a title that describes your investigation. Other information that should be included on the cover is, your name, your teacher’s name and the time period covered by your investigation.
- Leave the first two pages of the Project Log blank. You will use these to create a table of contents. Number all the pages that follow in the top, outer corner of each page.
- All writing should be done in blue or black ink.
- All entries should be written legibly. If your handwriting is poor you should print.
- All right-hand pages should be for formal entries. These include all thoughts, data, graphs, observations etc. The left-hand pages are more like scratch paper. Here you can make rough sketches, doodle and do calculations.
- Never tear a page from your Project Log. If the information on a page is not to be considered, draw a single diagonal line through the entire page.
- Photographs, computer printouts and other added material should be clearly labeled and taped or glued to a right-hand page.
- All numbers should carry the proper metric units.
REMEMBER: Your project log will see some action. It won’t be pretty. Your Report will be the pretty document. You should make every effort, though, to make sure the project logis complete, accurate, logical and as neat as possible.
Step 2: Come up With Your Question
Coming up with a good question is the most important, and often the hardest, part of your science project. Your question guides every other step in your project.
A good question…
- is clear
- is specific
- identifies the variables (“What is the effect of X on Y?”)
- is measurable
A bad question…
- is a question answered by “yes” or “no”
- has only two options (“Do plants grow better in fresh or saltwater?”)
- is one you already know the answer to (“Do plants grow better in the dark or in the light?”)
- is one you could find the answer to in a book (“Why do volcanoes erupt?”)
Make sure your question fits into one of the Categories for science fair projects.
Don’t forget to include in your Project Log how you came up with your question!
Step 3: Do Your Research
Now you need to hit the books. You will probably need to go to the library. Here you can search through science journals, encyclopedias and other resources to learn all you can about the topic of your investigation. The idea is for you to understand what is already known about your topic. This may help you refine your question.
For example, let’s say that you chose as your question, “What is the effect of the wavelength (color) of light on the growth of pea plants?” You would want to research pea plant growth and find out what is already known about how they grow under different wavelengths of light. Perhaps in your research you would discover that most plants grow best under a particular wavelength (color) of light. Knowing this you may wish to refine or change your question.
In the end you will want to learn as much as you can about what is already known about your area of research. Make sure you keep detailed notes on the resources you use. You will need this information to write your bibliography.
Don’t forget that the Internet can be a great resource in your research.
Don’t forget to include in your Project Log the results of your research!
Step 4: Come up With a Hypothesis
Now it is time to come up with a hypothesis. Hypothesis is just a fancy word for an educated guess. In other words, what do you think the answer to your question is. To put it another way, what do you think is the likely outcome of your investigation.
Let’s say your question is, “What is the effect of temperature on tadpole development?” Your hypothesis is what YOU think the effect is. In our example your hypothesis might be, “Tadpole development will be best at temperatures between 25 and 30 degrees Celsius, while the tadpoles will develop more slowly or not at all as the temperature drops below this range.”
Don’t forget to include in your Project Log the development of your hypothesis!
Step 5: Design Your Experiment
Now you must actually design your experiment. (NOTE: Throughout this website we use the words “investigation” and “experiment” interchangeably.) This means you must come up with a step-by-step procedure for figuring out the answer to your question.
For example, let’s say your question is, “What is the effect of temperature on crystal growth?” You will need to design an investigation in which you are growing crystals at different temperatures and measuring crystal growth.
Designing a good experiment means understanding Controls and Variables. Follow this link to learn more about them.
Don’t forget to include in your Project Log how you designed your experiment!
Step 6: Log into / Registrar for Scienteer
Before you actually begin your investigation you must make sure your project is approved. To do this you fill out and sign a protocol paper through Scienteer. Your teacher will review the information in the Scienteer system. Only then should you begin carrying out your experiment.
Step 7: Perform Your Experiment
Now begins the actual work of carrying out your investigation.
PROCEDURE: If you developed a clear and detailed, step-by-step procedure during the Design phase then this should be easy. All you need to do is carefully follow the steps and collect the data.
DATA TABLES: Data tables are a way for you to organize the data you collect during your investigation. A well-designed data table makes collecting and analyzing data easy.
GRAPHS: When you are done collecting data you will want to analyze the data and present it in a way that others can easily and clearly understand it. For this you need a Graph. Follow this link to learn more about making graphs.
RESULTS AND CONCLUSION: The results portion of your science project is a clear and simple statement that explains the data. The conclusion is the answer to the question you were investigating.
Step 8: Prepare Your Oral Presentation
When you finish your Science Project you will be asked to summarize everything you did and learned and to present this information orally to your teacher and peers. This is called the oral presentation. The oral presentation also may be part of what is presented to the judges at Science Fair and would include being able to answer questions about your Science Project.
TIPS FOR ORAL PRESENTATION
- Check your oral presentation thoroughly for grammar. Have your Language Arts teacher help you.
- Start early. A good oral presentation is the result of many hours of work.
- Practice at home in front of a mirror and in front of family members as well.
- Make sure your voice is well modulated. This means that you are neither too loud nor too soft and that your voice rises and falls normally. Sometimes, when a person is nervous, their voice can rise and get squeaky. Other times they speak with only one tone like a robot. This makes people fall asleep!
- Make and keep eye contact with your audience.
- Keep your head up.
- Make sure your voice is clear and that you enunciate (pronounce the words) clearly.
- Don’t shift back and forth on your feet. Either plant your feet solid and stand still, or, if you want to move, do so purposefully.
- Keep track of your hands. Don’t fidget.
- Avoid verbal clutter (“um”, “er”, “like”, “ya know” etc.). People use these phrases when they are thinking about what they will say. If you memorize completely what you will say you can avoid this problem.
- Sometimes memorizing a speech can cause another set of problems. A memorized presentation can come out sounding flat and emotionless. Sometimes a person speaks too quickly if they have their speech memorized. Know what you will say but avoid these mistakes also.
Step 9: Write Your Report
At the conclusion of your Science Project you will have to prepare a Report. The Report should be an exceedingly neat (read “typed”) document that includes the following items.
- Title Page
- Table of Contents
- Research
- Question
- Hypothesis
- Procedure
- Data
- Results
- Graphs
- Conclusion
- Bibliography
SHOW & TELL
Every presentation, like your report, has two major components. Those components are appearance and content. These are like “show” and “tell”. The appearance is the “show”. Your report should be exceedingly neat and attractive. The content is like the “tell”. Your report should give people all the information they need to understand exactly what you were trying to do, how you did it, and what you found out. You must make sure your presentation does a good job in both of these areas.
REPORT TIPS
- Check your report thoroughly for spelling and grammar. Have your Language Arts teacher help you.
- Start early. A good report is the result of many hours of work. Begin now to think about what it will look like.
- Make sure all your graphs; tables, charts and diagrams follow the guidelines.
Step 10: Prepare Your Google Slide/Powerpoint Presentation
Google Slide/Powerpoint Presentation
- Should have the following as Titles for the slides
- Problem/Question
- Hypothesis
- Variables
- Background Research
- Materials
- Procedure
- Data/Observations
- Charts
- Graphs
- Results
- Conclusion
- Works Cited
- Photo Credit
- Additional Data (Extra/not required)
- Project Forms
- Abstract
- Various forms that may be required like 1C or 7
Step 11: Prepare your Final Product
- Record your Oral presentation over your Powerpoint/Google Slide Presentation (Voice Over Slides)
- Should be between 5-7 Minutes long
- Can use WeVideo (District Provided)
- Speak clearly and have an understandable pace
- Here is a link to a video of how to record your voice over a Google Slide Presentation
SHOW & TELL
Together, the Oral Presentation and the Google Slide Presentation create your ultimate SHOW & TELL experience. Where your Google Slides/Powerpoint shows the Judges what you have learned, the voice recording of your Oral Presentation tells the Judges what you have learned.
FINAL PRODUCT TIPS
- The verbal explanations should match the visual representation that the judges see on the slide.
- Check for spelling and grammar mistakes on you Slide presentation
- Create a script for each slide using a Storyboard
- Check for grammatical errors in your script
- Practice before you record
- Let your voice show your enthusiasm about your Science Project
If you move on to the next level Science and Engineering Fair, your campus Science Fair Coordinator will direct you to what is needed for participation for the future fair. Please do not register yourself. The Regional Science Fair registration fee will be paid for by the Program Director of Middle School or High School Science.
Regional Science Fair – SWFH 2022 Schedule
JANUARY 2022
- Project Finalization and Advancement to SEFH January 28, 2022, 5:00 PM
- SEFH SRC Review Begins January 29, 2022
FEBRUARY 2022
- SRC Finalization, all projects must be cleared to compete at SEFH no later than February 7, 2022 by 5:00 PM.
- Project Check-in, all projects must check-in at the GRB between 2:00PM 7:00 PM, February 25, 2022
- Judging Begins February 26, 2022
State Science Fair – TXSEF 2022
Round 1 will take place virtually March 4-9, 2022.
Rounds 2 and 3 will take place in person at Texas A&M University March 25 and 26, 2022, pending COVID-19 and University restrictions.
State Resources
The resources below address various topics related to the science standards, awards, and organizations.
Science TEKS, Texas Administrative Code, Chapter 112, effective 2018-2019
Grades K-5 Science TEKS (PDF, 122KB)
Grade 6 Science TEKS (PDF, 26.76KB)
Texas Environmental Education Advisory Committee (TEEAC)
Texas Gateway (outside source)
Benchmarks for Science Literacy, American Association for the Advancement of Science (AAAS) (outside source)
National Academy of Sciences (NAS) (outside source)
National Youth Science Camp (outside source)
Presidential Awards for Excellence in Mathematics and Science Teaching (PAEMST) (outside source)
Science for All Americans, American Association for the Advancement of Science (AAAS) (outside source)
Science Professional Organizations (PDF, 18KB)
State Documents
The following documents are provided as a reference for science teachers.
Laboratory and Field Investigations – FAQ, August 2010 (PDF, 203KB)
Chemical Safety 2016 (PDF, 265KB)
Safety Information and Resources (PDF, 227KB)
Texas Education Agency Safety Laws and Rules (PDF, 222KB)
Texas Education Agency Science Facilities Best Practices (PDF, 38MB)
Please note the Facilities Standards can be found at http://tea.texas.gov/Finance_and_Grants/State_Funding/Facilities_Funding_and_Standards/Facilities_Funding_and_Standards.
Texas Education Agency Texas Safety Standards (PDF, 20MB)
District Documents
Primary Science YAG
Elementary Science YAGS
Middle School Science YAG
High School Science YAGS
Partnerships

Aldine ISD Students Qualify for TEXSEF State Championship Following Strong Showing at Gobble Grapple Tournament
John Hickman2025-11-13T15:35:17-06:00November 13th, 2025|
Aldine ISD Esports hosted its second annual Gobble Grapple Tournament, where students competed in Street Fighter 6 and Super Smash Bros. Ultimate Solos—both serving as official qualifiers for the Texas Scholastic Esports Federation’s (TEXSEF) state [...]

Eisenhower Science Teacher Remelia Arpino Named H-E-B Excellence in Education Award Finalist
Mike Keeney2024-02-01T09:09:15-06:00January 31st, 2024|
Eisenhower High School science teacher Remelia Arpino, second from left, poses with the $1,000 check she received from H-E-B for being named one of five state finalists in H-E-B's Excellence in Education Lifetime Achievement [...]
Aldine ISD to Host CPR Classes
Mike Keeney2022-12-01T10:38:08-06:00November 30th, 2022|
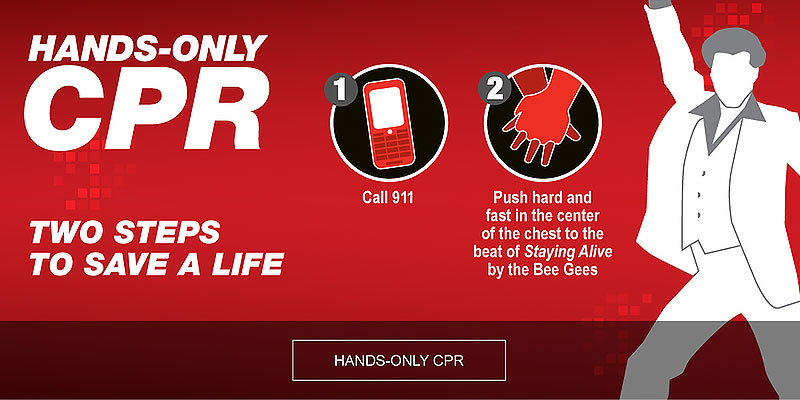
Aldine ISD’s Health Services Department will hold CPR classes monthly from Dec. 2 through Apr. 22. The CPR classes are open to Aldine ISD students, parents, and community members. The classes are available to individuals [...]

15 AISD track athletes qualify for Region II Meet
Mike Keeney2022-04-27T10:51:48-05:00April 25th, 2022|
Fifteen Aldine ISD track and field athletes have qualified for the Region II Track and Field Meet, which will be held April 29-30 at in Waco at Midway High School. The Eisenhower High School boys’ [...]

JASON Learning’s Design Thinking Ambassador Program Launches; District Leaders to Collaborate With Stakeholders
Leticia Fehling2021-11-04T15:19:32-05:00June 10th, 2021|
The program seeks to connect educators with industry to develop STEM opportunities for students. JASON Learning (JASON) launched its Design Thinking Ambassador Program in Aldine ISD. The program will support schools and educators in developing [...]
Aldine ISD Student, Teacher Chosen as 2019 National JASON Learning Argonauts
Leticia Fehling2021-11-04T15:19:55-05:00April 25th, 2019|
The Argos will head to Costa Rica to experience a week-long adventure with researchers and educators. Carolyn García (center) has been selected as a JASON Learning Argonaut for 2019. The Aldine ISD junior is [...]
Aldine ISD High School Educator and Student’s STEM Adventure Takes Them to the Bahamas
Leticia Fehling2021-11-04T15:22:10-05:00September 17th, 2018|
The Chevron-JASON Learning initiative made the summer expedition to Cape Eleuthera Island possible. Teacher Sean Doyle (third from right) and student Keilah South (far right) pose with fellow National JASON Argonauts and program coordinator [...]

Aldine ISD High School Student and Teacher Chosen as 2018 National JASON Learning Argonauts
Leticia Fehling2021-11-04T15:20:08-05:00April 27th, 2018|
The Argos will head to the Bahamas to experience a week-long adventure with researchers and educators. Carver HS junior Keilah South poses with her parents, Michael and Raquel South. Olivia Boatner (far left), magnet [...]
